LED Screen Repair: Troubleshooting & Fixes & Maintenance
In an age of visual feasts, LED screens are everywhere, and it is also difficult to avoid the problem of LED screen repair. From digital signage to active video walls, LED screens are colorful and eye-catching displays, but they are also complex electronic systems, and LED screens are prone to failure.
https://youtu.be/HGt0uaPaOC0?si=C2xy2kkENftok7qc
This guide delves into the intricacies of professional LED screen repair, covering its principles, common problems, diagnostic techniques, repair methods, and key considerations.
Table of Contents
1. Understanding the LED Screen Anatomy
How LED display works? Before tackling the LED screen fix, understanding the fundamental components and the principle of an LED display screen is essential:
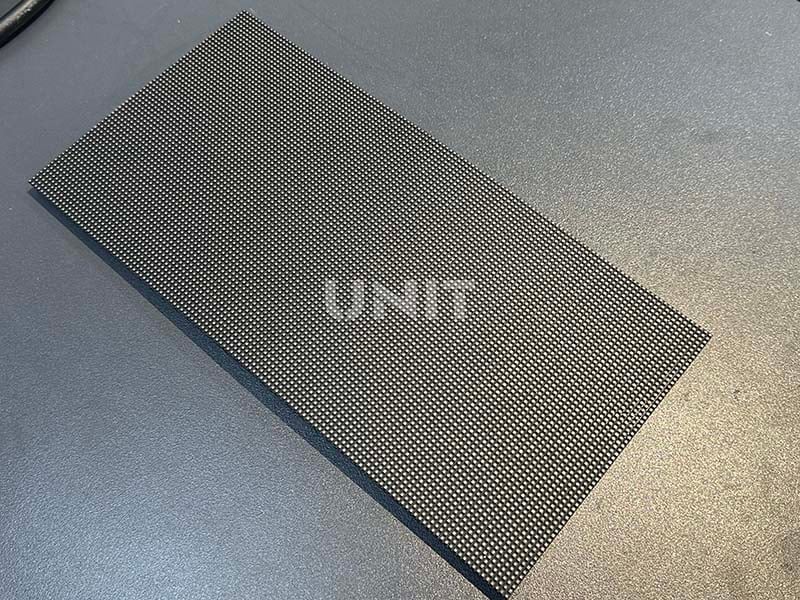
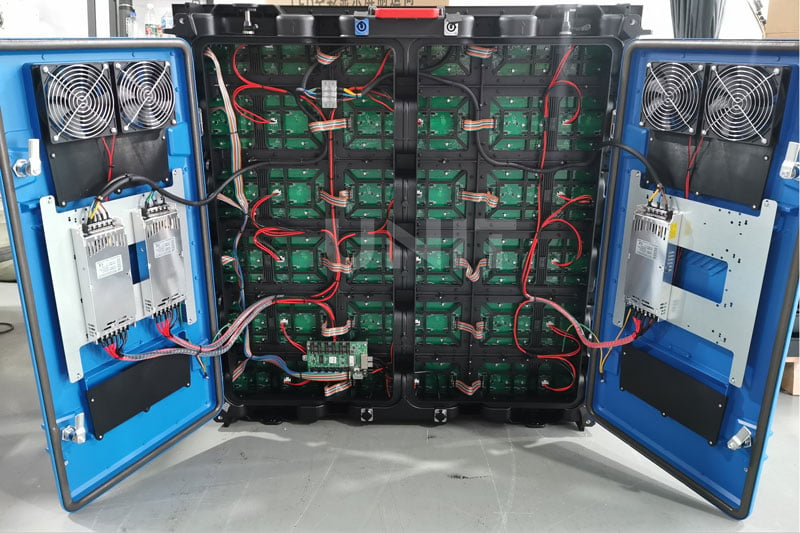
① LED Modules/Panels:
The basic units form the display screen. Each module contains many tiny LED lights grouped in clusters (usually red, green, blue—RGB) to create colored pixels. Modules are assembled into larger panels or cabinets.
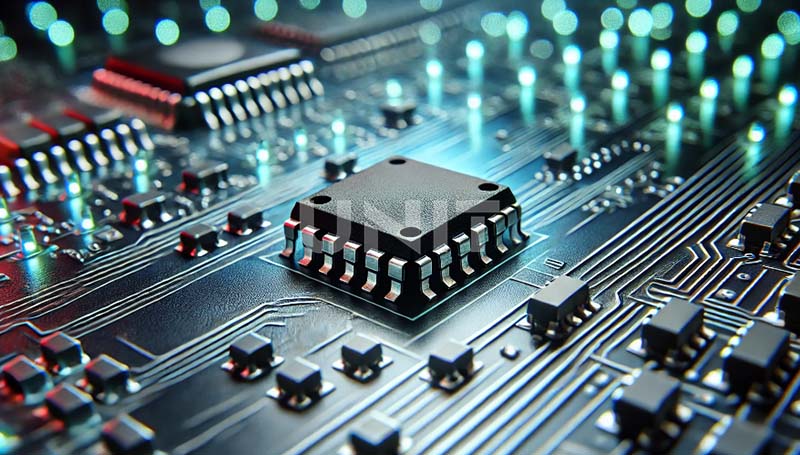
② LED Chips & Driver ICs:
Inside each diode package sits an LED chip—the semiconductor that lights up. Driver ICs (integrated circuits) sit on the same board and regulate the voltage and current to each chip or cluster, translating the controller’s commands into precise light output.
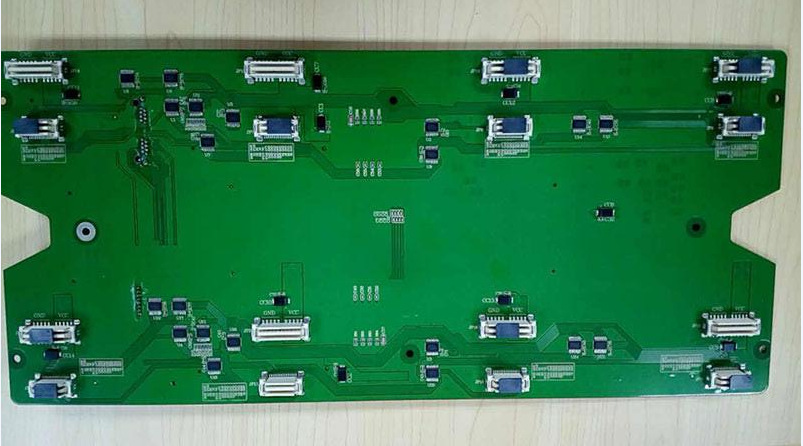
③ PCB (Printed Circuit Board):
The base plate where LEDs, driver chips, and other small electronic parts are attached. It provides the wiring connections between them.
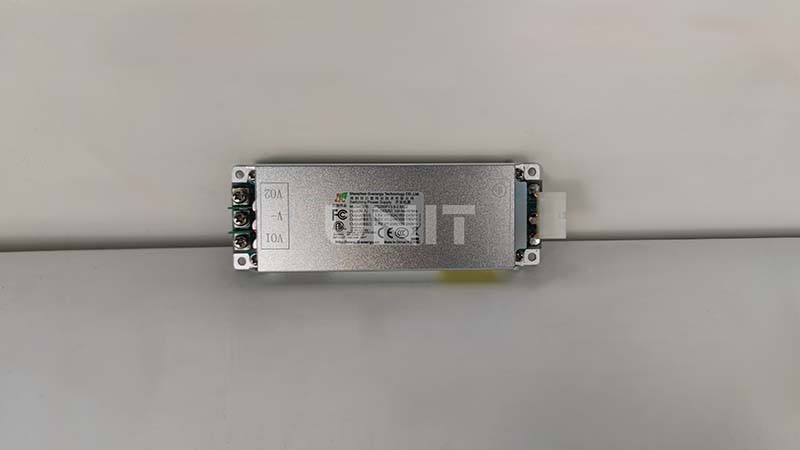
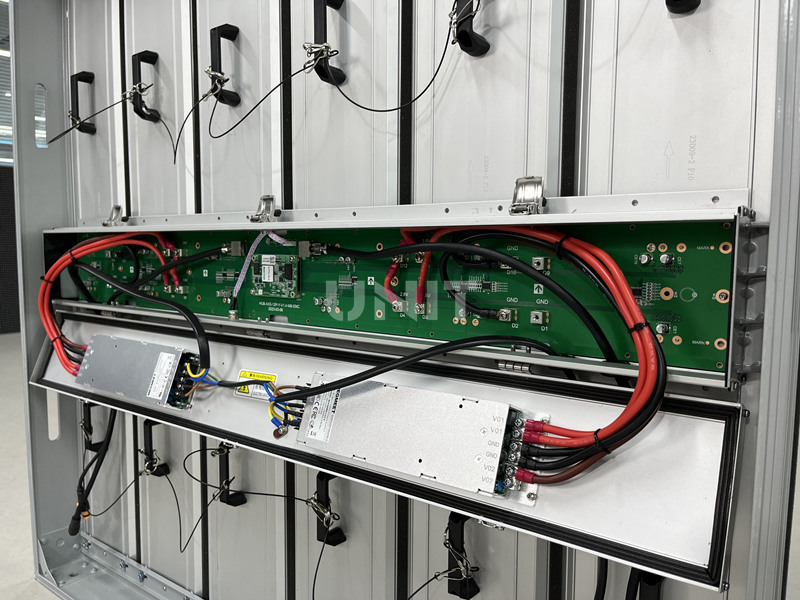
④ Power Supply Unit (PSU):
Converts regular wall power (AC) into the stable, lower-voltage direct current (DC) needed by the screen’s electronics and LEDs.
⑤ Controller/Receiver Card:
This is the display’s “brain.” It receives the video signal (like from a computer), processes it, and sends control instructions and power signals to the modules via cables. It also often manages screen calibration.
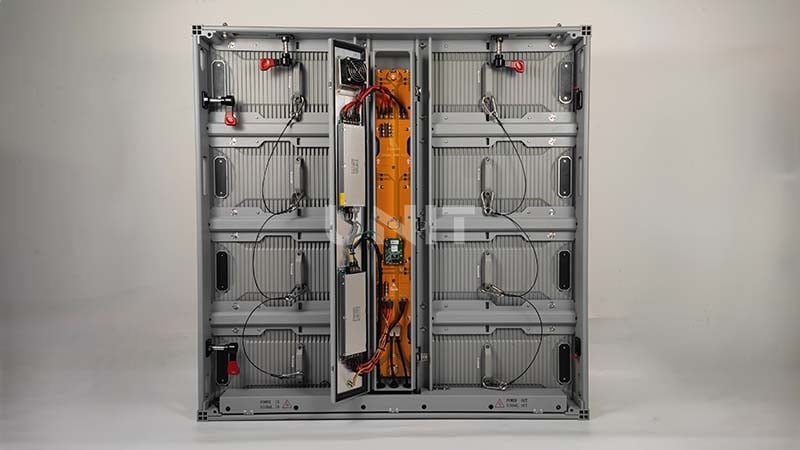
⑥ Housing/Cabinet:
The strong metal frame holding the modules/panels. It protects the electronics, provides cooling (fans/heatsinks), and weatherproofing for outdoor screens.
⑦ Data & Power Cables:
The network of wires connecting the controller to the modules and linking modules together. They carry both the control signals and the electrical power needed for operation.

2. Common LED Screen Failures and Symptoms
Before learning how to fix LED screen, we need to know about LED screen damage types. The common LED screen failures manifest in various ways:
Failure 1. Dead Pixels/Modules:
Individual pixels, clusters, or entire modules remain completely dark.
Causes: Failed LED chip, open circuit in LED bond wires, failed driver IC specific to that pixel/module, damaged PCB trace, loose connector, or faulty power feed to that section.
Failure 2. Dim Pixels/Modules:
Pixels or modules are significantly less bright than the rest of the screen.
Causes: Degraded LED efficiency (age, overheating), failing driver IC providing insufficient current, voltage drop due to high resistance in power lines or connectors.
Failure 3. Flickering Pixels/Modules:
Irregular or rapid blinking of pixels, clusters, or modules.
Causes: Loose connections (data or power), failing driver IC, unstable power supply output, signal interference, overheating components, or faulty controller output.
Failure 4. Color Distortion:
Sections or the entire screen display incorrect colors, often dominated by one color or missing a primary color.
Causes: Failure of driver ICs controlling a specific color channel (R, G, or B), damaged data lines carrying color information, faulty controller processing, or calibration data corruption.
Failure 5. Vertical/Horizontal Lines:
Solid or flickering lines running vertically or horizontally across the screen.
Causes: Often related to data transmission. Failed driver ICs along a row/column, damaged data ribbon cables between modules/cabinets, faulty output from the controller card, or cracked PCBs interrupting data paths.
Failure 6. Image Ghosting/Shadowing:
Faint remnants of previous images persist.
Causes: Often related to driver IC malfunctions failing to reset pixels properly, or power supply issues causing slow discharge.
Failure 7. No Display/Blank Screen:
The entire screen is dark, though power indicators might be on.
Causes: Complete failure of the main PSU, blown fuses, catastrophic failure of the controller card, major data bus failure, or significant power interruption.
Failure 8. Intermittent Operation:
The screen works sporadically, cutting out randomly.
Causes: Loose or corroded connectors, failing power supply under load, overheating components triggering shutdown, damaged cables, or marginal controller/card performance.
3. Diagnostic Process: Finding the Fault
Effective LED screen repair hinges on systematic diagnosis:
Process 1. Visual Inspection
- Physical Damage: Look for cracked modules, dented cabinets, water ingress, or burnt parts.
- Connections: Check for loose or corroded data/power cables and damaged connectors.
- Cooling: Inspect vents and fans for dust buildup or failure; watch for heat-scorch marks.
- Seating: With power off, gently wiggle modules and cards to spot poor seating.
Process 2. Document Symptoms
Note exact fault patterns (e.g., “dead module at row 3, column 2” or “green flicker on right third”) to pinpoint the affected area.
Process 3. Signal Tracing & Isolation
- Swap Test: Exchange suspect modules, cables, or cards with known-good ones, if the issue moves, you’ve isolated it.
- Section Isolation: Disconnect half the panels to determine if the fault is upstream (controller/PSU) or downstream.
Process 4. Electrical Checks
- Voltage: Use a multimeter to confirm PSU outputs and module input voltages.
- Continuity: Test cables and PCB traces for breaks.
Process 5. Software & Configuration
Verify controller settings, firmware version, and calibration data. Reload firmware or perform a factory reset if needed.
4. How to Repair LED Screen? Repair Methodologies!
How to fix LED screen? The LED screen repair approach depends on the diagnosed fault and component level:
Fix 1. Module/Panel Level Replacement: For LED screen fix, replacing an entire malfunctioning module or panel is efficient, especially for complex failures or when component-level repair is impractical. Requires matching the exact module type and often calibration after installation.
Fix 2. Driver IC Replacement: A common component-level repair for issues like dead sections, color loss, or flickering. Requires:
- Identification: Locating the specific faulty driver IC (often guided by the failure pattern).
- Desoldering: Carefully removing the defective IC using a hot air rework station and precision tools.
- Soldering: Precisely soldering a new, compatible driver IC onto the PCB pads. This demands excellent micro-soldering skills and ESD precautions.
https://youtu.be/k4sn6rjcN70?si=AIC51FSUTNsosMHu
Fix 3. LED Replacement: Repairing individual LEDs is rare in modern high-density displays due to extreme difficulty and cost-ineffectiveness. It might be attempted on lower-density, larger-pitch screens or specific COB modules using specialized reflow equipment, but module replacement is almost always preferred for LED display screen repair.
Learn more: SMD vs COB: Which LED Technology is Better for Displays?
Fix 4. PCB Trace Repair: Fixing broken copper traces on a module’s PCB using jumper wires or conductive epoxy. Requires careful isolation and routing.
Fix 5. Connector/Cable Repair: Replacing damaged data or power cables, repairing bent pins on connectors, or cleaning corroded contacts. A frequent fix for intermittent issues or lines.
Fix 6. Power Supply Repair/Replacement: Replacing faulty capacitors, fuses, or voltage regulators within the PSU, or more commonly, replacing the entire PSU unit for reliability to repair LED screen.
Fix 7. Controller/Receiver Card Repair/Replacement: LED screen troubleshooting or replacing the central processing unit. Often involves firmware reloads or a complete card swap.
Fix 8. Cleaning & Maintenance: Addressing overheating by cleaning dust from heatsinks, fans, and vents; replacing failed fans; reapplying thermal paste. Reseat all connectors firmly. This can resolve many intermittent or thermal-related issues.
Fix 9. Calibration: After any module replacement or significant repair, color and brightness calibration are essential to ensure uniformity across the entire display.
Here are some videos about how to fix LED screen:
https://youtu.be/UR0sQCwxZl8?si=TRMerAnvNQ214P3D
How to Fix a Broken Lamp in a GOB LED Module?
https://youtu.be/pIQ9MICI9iI?si=M6YHoDHcrmAuYKGV
How to Replace Broken LED Lamp & Broken IC?
https://youtu.be/kINu13k241g?si=DZYFdyULCpCvvsdE
Troubleshooting LED Lamp Bead Abnormality & Solution
https://youtu.be/9IVgIOtvqNU?si=TmcRXZRBoqQF3uHK
LED Display Power Box Repair & Maintenance
5. Critical Considerations in LED Screen Repair
For Safety:
Electrical: Disconnect power, discharge capacitors, and verify with a meter before touching. High voltage is lethal.
ESD: Use grounded straps/mats/tools. Components are static-sensitive.
Physical: Handle heavy screens carefully; lift properly. Beware of sharp edges and hot components. Use chemicals in ventilated areas.
Expertise: Deep electronics knowledge, digital signaling, power systems, and micro-soldering skills are essential.
For Technical:
Tools: Requires multimeters, oscilloscopes, thermal cameras, ESD gear, LED testers, and calibration tools.
Repair vs Replace: Component repair (cheaper) needs skill/time. Module swap (faster) costs more. Consider labor, parts, age, and criticality.
Parts: Sourcing exact, compatible modules/ICs can be difficult, especially for older screens.
Calibration: Record faults, repairs, parts, and calibration data.
Document: Keep detailed records of the fault, diagnosis process, repairs performed, parts replaced, and calibration data in the LED screen repair process for future reference and warranty purposes.
6. Why LED Screen Fix Matters?
For LED screen repair, while replacing an entire screen might seem straightforward, professional repair offers significant advantages:
● Cost Savings: The LED display repair cost of repairing a specific fault (e.g., a module or driver IC) is almost always significantly cheaper than replacing the entire screen or large sections.
● Sustainability: Extending the lifespan of electronics reduces e-waste, conserves resources, and minimizes environmental impact.
● Minimized Downtime: For critical applications (Jumbotron screen advertising, control rooms, live events, retail), a targeted repair can restore function much faster than procuring and installing a massive replacement screen.
● Preservation: For custom or hard-to-replace installations, repair is often the only viable option.
7. Best Practices for Maintenance
Regular inspection and maintenance of LED displays can help reduce the number of LED screen repairs:
Cleaning: Power off before cleaning. Remove dust with microfiber cloths or anti-static brushes. Wipe down with mild solutions (distilled water or electronic cleaner).
Regular Inspections: Monthly checks: cables, connectors, and tightness of mounting frames. Look for flickering or discoloration early on.
Environment Control: Keep the ambient temperature and humidity steady. Ensure adequate airflow and protection from extreme conditions.
Firmware & Software Updates: Keep OS, control cards, and processors current. Fixes and newer features can prevent issues or improve performance.
Use Surge Protection: LED walls need clean power. Install surge protectors or UPS systems to safeguard electronics.
Calibration & Color Management: Periodically recalibrate to maintain consistent brightness and color uniformity using tools like NovaLCT.
8. Conclusion
LED screen repair is a sophisticated blend of technical knowledge, diagnostic skill, precision manual dexterity, and problem-solving. It moves far beyond simple part swapping, requiring an understanding of complex electronic systems, digital data flow, and power management.
Choosing high-quality LED display screens and a professional technical team can reduce a lot of trouble in LED screen repair!