How to Improve the LED Screen Lifespan? Several Tips for You!
Have you ever experienced an LED display not working? An unexpectedly black screen or flickering video wall can interrupt an event, frustrate visitors, and cause costly downtime.
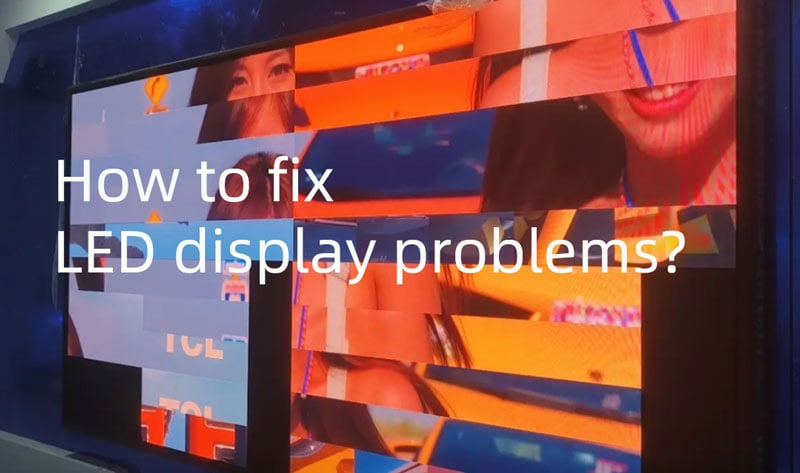
LED displays have become an integral part of events, retail spaces, control rooms, and outdoor advertising. If your LED screen suddenly dims, flickers, or displays distorted colors, it can be very disruptive to your presentation and even leave you at a loss. How to fix LED display problems?
This guide will help you understand the causes of an LED display not working, how LED screens work, the most common failure points, and a step-by-step troubleshooting process to get your screen back in top shape!
Table of Contents
1. How LED Displays Work?
Understanding how LED displays work is key to finding out why the LED display is not working. At its core, an LED video wall is an intricate combination of light-emitting elements, power electronics, data processors, and interconnecting hardware that together form a seamless, high-definition screen.
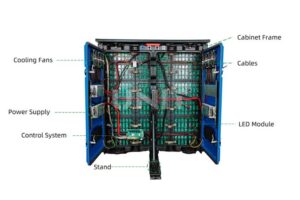
1.1 Basic Components
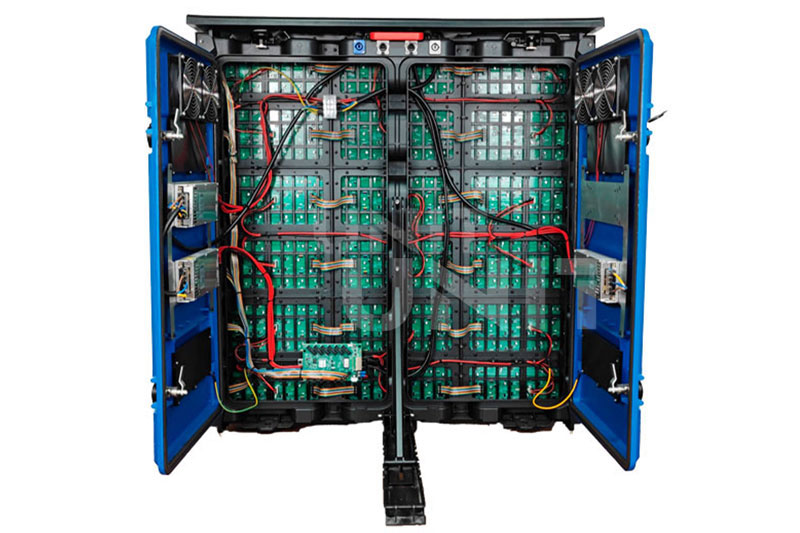
① LED Modules/Panels:
These are individual tiles containing tiny red, green, and blue LEDs on a circuit board. These LEDs act as sub-pixels that mix to create any color. Modules physically snap together using connectors to form large displays of any size.

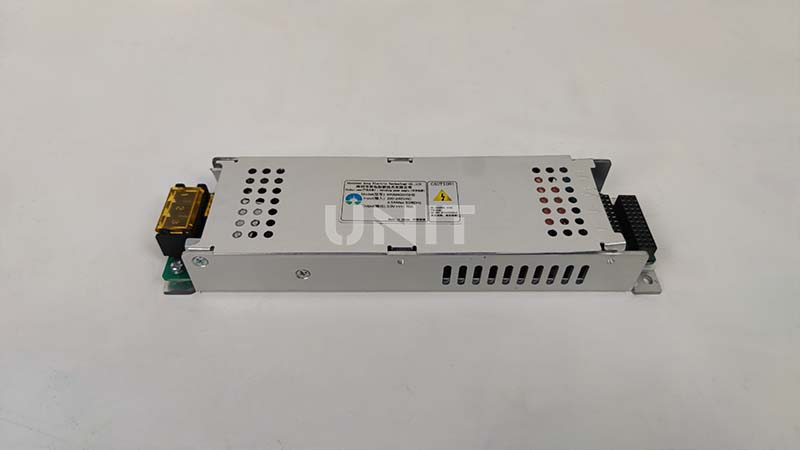
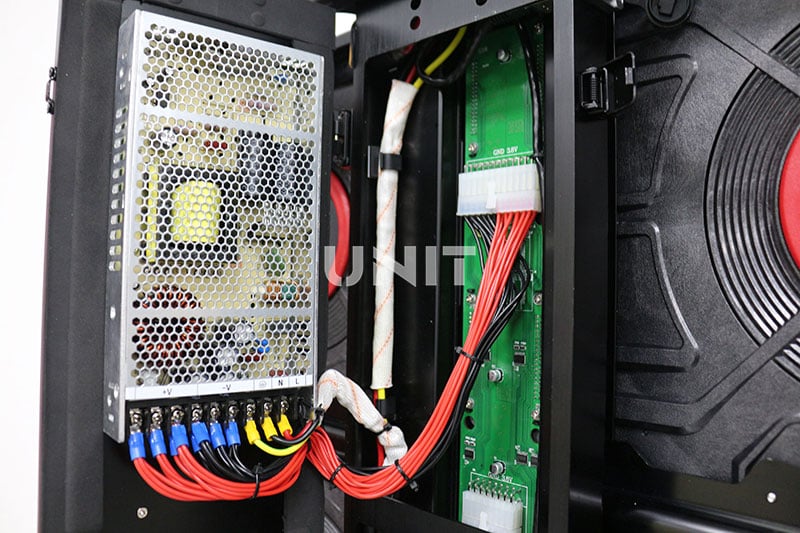
② Power Supply Units (PSUs):
PSUs convert standard high-voltage wall power (AC) into stable low DC voltages (like 5V and 24V) needed by the modules. Good PSUs include protection features to prevent damage and keep brightness consistent despite power fluctuations.
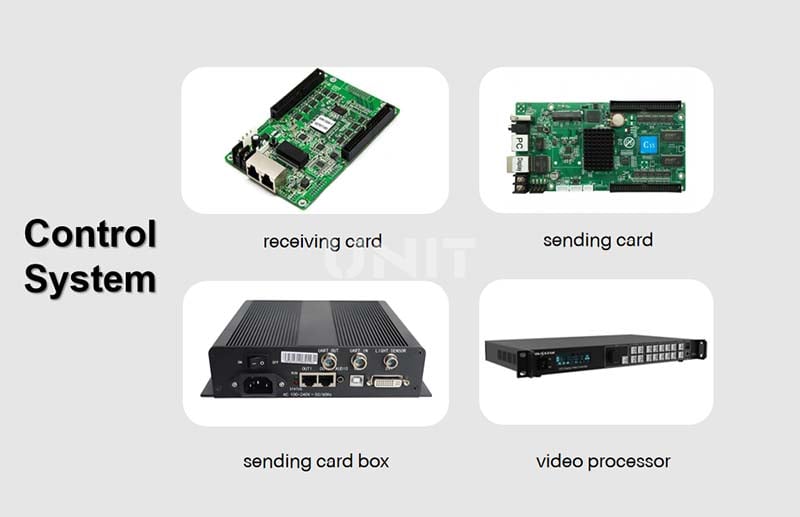
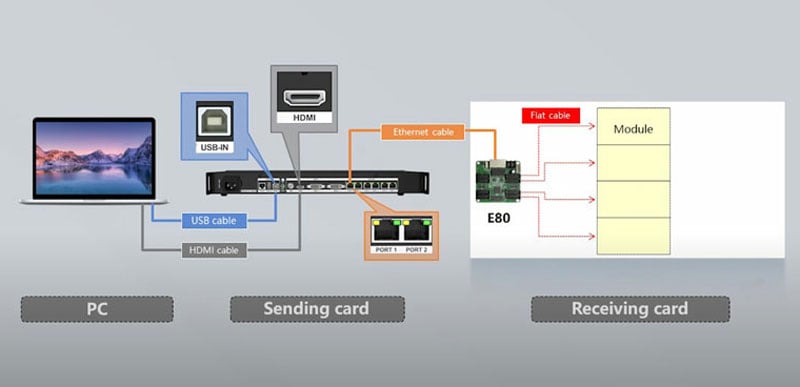
③ Control System & Sending Cards:
A “sending card” (in a PC or media server) captures the video signal (e.g., HDMI). It compresses and encodes the video frames into data packets. These packets are sent to the display. Each module has a “receiver card” that decodes these packets, turns them into precise timing signals, and rapidly drives the individual LED sub-pixels at very high speeds (often over 3,840 Hz) for smooth, flicker-free images.
④ Cabling & Signal Chain:
Dedicated cables connect everything. Power cables deliver electricity from the PSUs to the modules. Data cables (like Ethernet or ribbon cables) carry the encoded video signal from the sending card to the receiver cards on the modules. Standard video cables (HDMI/SDI) connect the source to the control PC.
1.2 Signal Flow & Operation
● Source Input:
A PC, media player, or camera sends a video signal at the desired resolution and frame rate to the sending card.
● Data Encoding & Transmission:
The sending card divides each video frame into packets and transmits them via network cables, directing each packet to the appropriate receiver card by module ID.
● Decoding & Pixel Driving:
Receiver cards decode the data, calculate on/off times for each LED, and send electrical signals to the LED drivers on the module to light up the correct pixels.
● Firmware & Software Calibration:
Firmware on the sending and receiving cards handles color calibration, gamma correction, and synchronization across modules. Control software enables technicians to adjust refresh rates, balance colors, and configure irregular panel layouts, ensuring seamless display performance.
By understanding these components and how LED screen work together, which help you quickly identify why your LED display not working, such as power failures, data errors, or module malfunctions, and ensure high-quality visual presentations.
2. Issues of Each LED Display Component Not Working
An LED display screen operates as a complete system, and any failure in one of the components may cause the entire LED display not working. Different components of the LED display system can cause different problems when they fail.
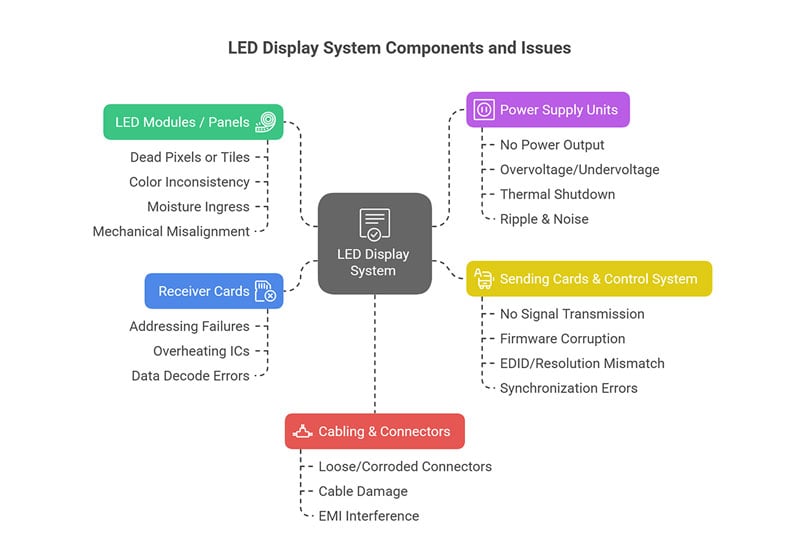
① LED Modules / Panels
Dead Pixels or Tiles: Individual LEDs burn out or lose connection, leaving black spots or entire module sections dark.
Color Inconsistency: Phosphor degradation or driver IC drift can cause hue shifts, leading to mismatched colors across the wall.
Moisture Ingress: Poor sealing allows humidity to corrode solder joints, resulting in intermittent blackouts or flicker.
Mechanical Misalignment: Bent frames or mis-seated modules produce visible seams or gaps, breaking the image continuity.
② Power Supply Units
No Power Output: Blown internal fuse or failed transformer windings cause the entire display to remain unlit.
Overvoltage/Undervoltage: Faulty regulation leads to inconsistent brightness, flickering, or premature LED failure.
Thermal Shutdown: Overheating—due to clogged vents or fan failure—triggers built‑in protection that cuts power.
Ripple & Noise: Poor filtering generates voltage ripple, introducing flicker or irregular brightness patterns.
③ Sending Cards & Control System
No Signal Transmission: A failed sending card or driver software crash prevents data packets from reaching the display.
Firmware Corruption: Interrupted or incorrect firmware updates leave the card unresponsive or misconfigured.
EDID/Resolution Mismatch: Incorrect resolution settings cause a blank screen, letterboxing, or squashed images.
Synchronization Errors: Timing misalignments between multiple sending cards lead to tearing or stuttering video.
④ Receiver Cards
Addressing Failures: Misprogrammed or damaged receiver IDs cause modules to show no image or display data meant for another panel.
Overheating ICs: Poor heat sinking can fry driver chips, resulting in module‑level blackouts.
Data Decode Errors: Corrupted packet parsing yields random noise, color blocks, or frozen frames.
⑤ Cabling & Connectors
Loose/Corroded Connectors: Oxidation or vibration can interrupt power or data paths, causing flicker or complete signal loss.
Cable Damage: Pinched or kinked Ethernet/HDMI cables introduce packet loss, image artifacts, or no display at all.
EMI Interference: Unshielded cables running near high‑power lines can pick up noise, leading to random resets and shimmering.
By systematically checking each component, you can isolate the fault and restore your LED display’s performance.
3. Top 8 Common Causes of “LED Display Not Working”
LED screen cabinet, also called LED screen frame, is a modular unit assembled into large video walls. LED display cabinets can be divided into different types based on their materials, applications, maintenance methods, and shapes.
LED screens comprise multiple electronic subsystems, any one can cause the LED screen to stop working. Here are the 8 most frequent culprits:
Cause 1. Power Supply Failures
- Symptoms: The entire screen remains black; occasionally powers off.
- Root Causes: Blown fuse, faulty transformer, voltage spikes.
- Checkpoints: Verify AC input voltage; inspect PSU indicators; test output voltages with a multimeter.
Cause 2. Faulty Data Cables or Connectors
- Symptoms: No image on certain panels; color blocks or static.
- Root Causes: Loose RJ45, damaged HDMI/DVI pins, cable wear
- Checkpoints: Reseat all cables; substitute known-good cables; inspect connectors under magnification.
Cause 3. Control Card or Receiver Card Issues
- Symptoms: Sections of the wall go dark or display incorrect colors.
- Root Causes: Corrupted firmware, overheating ICs, misconfigured settings.
- Checkpoints: Swap sending card into a different slot; re-flash firmware; monitor card temperatures.
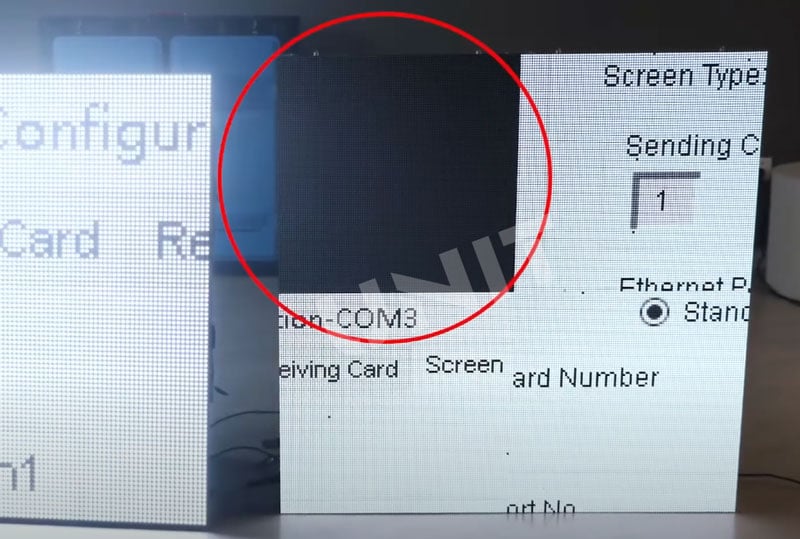
Cause 4. Software & Configuration Errors
- Symptoms: Screen upside-down; cropped image; wrong resolution.
- Root Causes: Incorrect EDID data, mismatched aspect ratio, outdated drivers.
- Checkpoints: Reset to factory defaults; re-map module positions in configuration software; update drivers.
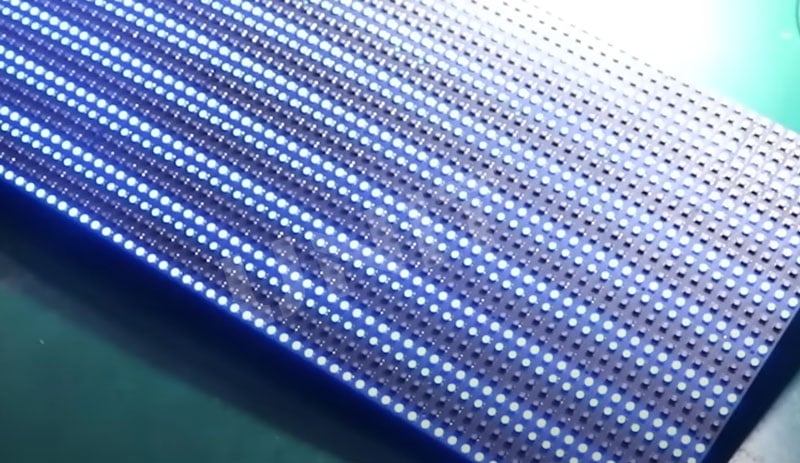
Cause 5. LED Module or Pixel Failures
- Symptoms: Single dead pixels; entire module tile-out (black square).
- Root Causes: Burnt‑out LEDs, solder joint cracks, and moisture ingress.
- Checkpoints: Isolate failing module; replace or re-solder module; ensure proper IP rating for environment.
![]()
Cause 6. Environmental & Installation Factors
- Symptoms: Flickering in direct sunlight; sporadic shutdowns when humid.
- Root Causes: Inadequate ventilation, insufficient IP protection, and extreme temperatures.
- Checkpoints: Improve airflow; install shade or cooling; verify module IP rating matches location.
Cause 7. Signal Source Problems
- Symptoms: Blank feed; frozen video frame.
- Root Causes: Media player crash, unsupported resolution, cable handshake failure.
- Checkpoints: Test source on a known-good LED display; adjust output resolution to match panel specs; reboot source device.
Cause 8. Grounding & Electrical Interference
- Symptoms: Random resets; wavy lines or shimmer across the screen.
- Root Causes: Poor grounding, nearby heavy electrical equipment, EMI.
- Checkpoints: Ensure chassis ground; separate power/data cables; use shielded cables and ferrite cores.
4. Step by Step Troubleshooting
Can an LED display be repaired? Of course! How to fix LED display problems? Follow the principle of starting from the simple to the complex, from the outside to the inside. Please follow the steps below to find and solve most LED display not working problems.
Step 1: Calm observation and preliminary judgment
① Record the phenomenon:
Why is your LED display not working? Record the LED display fault phenomenon in detail (Completely black? Flickering? Partial? Flickering?), the time of occurrence, and the environmental conditions (Is it a thunderstorm? High temperature?).
② Basic confirmation:
Power indicator: Observe whether the LED screen, sending card, processor, and power supply itself have power indicator lights? Is it on? (Green/red?)
Signal source status: Confirm whether the computer/player is working properly? Is the screen extended? Is the playback software running? Try to restart the signal source device.
Environmental inspection: Smell whether there is a burnt smell? Touch the LED screen/power supply surface to see if it is abnormally hot? Listen for abnormal noise (such as fan stopping)?
Step 2: Power path depth detection (Core!)
① Check input:
● Use the AC voltage range of the multimeter to measure the voltage at the bottom of the main switch and the input/output end of the air switch. Is it normal (about 220V AC)? Is the switch trippedto cause the LED display not working? Try to reset it.
● Check whether the power cord is obviously damaged and whether the plug is firmly plugged in.
② Check output:
Key operation: On the premise of disconnecting all loads (unplugging the power cord connected to the module/receiving card), use the DC voltage range of the multimeter to measure the output end of the switch power supply (usually V+ and V- or COM). Is it near the nominal value (commonly 5V DC)? Multiple power supplies need to be measured one by one. If there is no output or the voltage is abnormal, the power supply is faulty to cause the LED screen not working.
If the power supply output is normal when it is unloaded, and the voltage drops sharply or the power supply is protected after the load (LED module/receiving card) is connected, it may be that the load is short-circuited or the power supply is insufficient.
③ Check the line and connection:
● Check whether the power cord connection from the power supply to the distribution box and the power supply to the LED module/receiving card is firm? Are the terminals oxidized or burned?
● Check whether the power distributor (if any) is normal.
Step 3: Detailed inspection of signal link (Critical!)
① Check the source end:
● Replace a confirmed good signal cableto connect the computer and processor/sending card.
● Try to output the computer signal to another confirmed normal monitor to verify whether the computer and graphics card output are normal.
● Check the computer display settings (multi-monitor settings, resolution, refresh rate).
② Check transmission:
● Network cable/optical fiber: Check whether the crystal head is intact. Is the line sequence correct? Try to replace the network cable. For long-distance transmission, confirm that qualified cables are used and do not exceed the standard limit (network cable ≤ 100 meters), and add repeaters/optical fibers if necessary.
● HDMI/DVI, etc.: Check whether the interface is physically damaged. Is the cable plugged in tightly? Try to replace the cable.
● Observe the indicator light: Is the LINK/ACT indicator light of the sending card, receiving card, and network switch on/flashing normally? Is the status indicator light of the sending card normal?
③ Check the receiving end:
● Check whether the input signal indicator light of the receiving card is on. If not, the signal has not been delivered to the receiving card.
● Check whether the cable from the receiving card to the HUB board and the HUB board to the module is plugged in tightly? Is the gold finger oxidized or bent? Try to re-plug or replace the cable. Special note: Be sure to turn off the power before operation!
● Check whether the receiving card DIP switch settings (IP address, port number, scan type) are correct? Check against the manual.
Step 4: Control system status diagnosis (Brain Check)
① Restart method: How to fix LED display not working problem? Restart in order: signal source computer/player → video processor → sending card → receiving card (usually achieved by restarting the power of the entire screen). Sometimes it can solve temporary software deadlocks.
② Software check:
● Confirm that the LED control software (such as Nova, Linsn, Colorlight, etc.) has been started and is running normally.
● Check whether the screen parameter configuration in the software (physical size, scanning mode, OE polarity, data polarity, brightness, etc.) is completely consistent with the hardware? Parameter errors are a common cause of flowery and black screens!
● Try to reload or send programs to the LED screen.
③ Hardware status: Touch the sending card and receiving card to see if the temperature is abnormally high (need to dissipate heat)? Check if the error indicator on the card is on?
Step 5: Screen hardware positioning and repair (Deep into the Lesion)
① Locate the faulty unit: For partial black screen or abnormality:
● Observation method:Determine the boundary of the failure area and find the corresponding module or box.
● Cross-test method (recommended): Swap the suspected problematic module/cable/receiving card with the adjacent confirmed normal identical component. If the fault moves with the component, lock the source of the fault; if the fault remains in place, check the power supply, signal line or structural connection at that location.
② Module-level repair (professional skills required):
● Check the power supply: Measure whether the voltage of the module power input terminal is normal (such as 5V).
● Check the signal: Check whether the input cable is normal? Try to replace it.
● Check the driver IC: Observe whether the IC has any signs of burning (bulge, crack, scorch mark)? Use a multimeter to measure the resistance of the key pin to ground to determine whether it is short-circuited.
● Check the lamp beads: For partial dead lights/color deviation, use an LED tester or software to light up a single color to check the status of the lamp beads. Damaged lamp beads need to be replaced with a hot air gun or soldering iron (same model and same batch).
③ Replace spare parts: For confirmed damaged power supplies, receiving cards, modules, cables, etc., use spare parts of the same model and specifications to replace them. After replacing the module or receiving card, be sure to check or reconfigure the relevant parameters in the software!
Check our LED Display Troubleshooting Video Checklist!
5. LED Display Not Working: Real Case Study
There are many cases of LED display not working, such as:
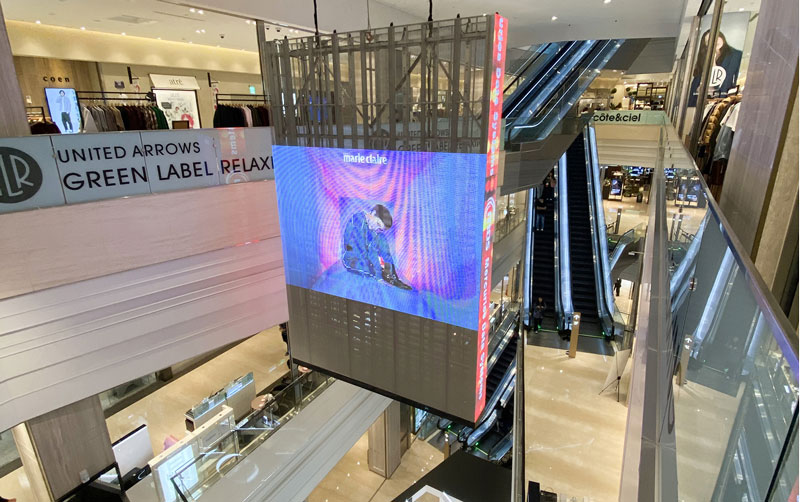
Case 1: The giant screen in the atrium of the shopping mall is turned on, and the screen is black
Phenomenon: When the machine is turned on in the morning, the entire jumbotron screen has no display, and the indicator light of the power cabinet is on.
Troubleshooting: Check that the main switch and the circuit breaker are closed normally.
Key action: Disconnect all module power loads and measure the power output of the main switch: 0V! Further inspection found that the screws of the power input terminal were loose, and poor contact caused heating and oxidation.
Solution: Thoroughly clean the oxide layer and tighten the input terminal screws. The power output is restored to 5V and the screen is lit.
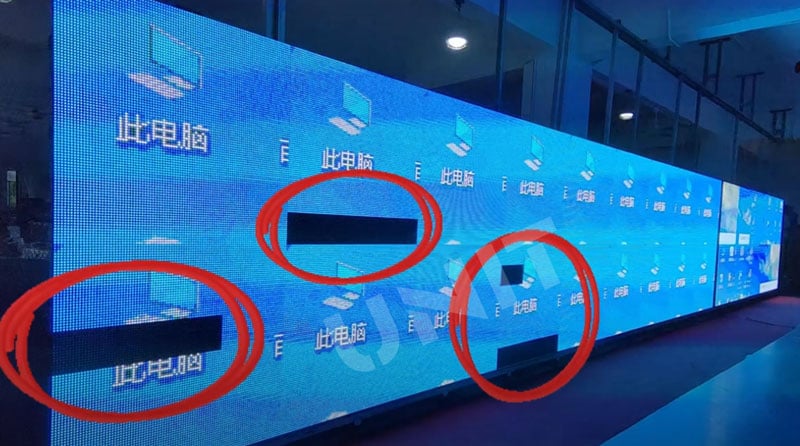
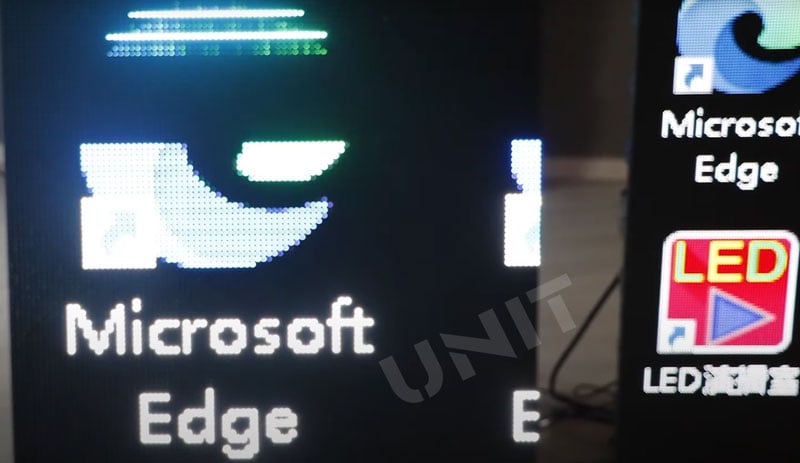
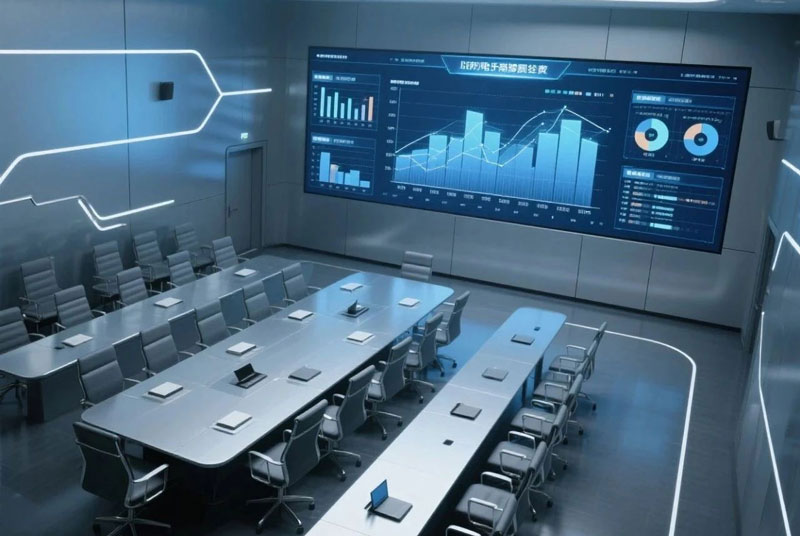
Case 2: The LED screen in the conference room is full of snowflakes
Phenomenon: In the middle of the meeting, the screen suddenly appeared full of colorful snowflakes and the content was distorted.
Troubleshooting:
- Restarting the computer, processor, and screen power supply is ineffective.
- Check that the status light of the sending card is normal, the LINK light of the network port is on, but the ACT light flashes abnormally slowly.
- After replacing the main network cable from the sending card to the switch, the fault disappeared.
- After checking the original network cable, it was found that a core in the crystal head was poorly connected.
Solution: Replace with a qualified network cable.
6. Preventive Maintenance & Best Practices Tips
Regular upkeep LED display screen reduces the likelihood of LED display not working failures.
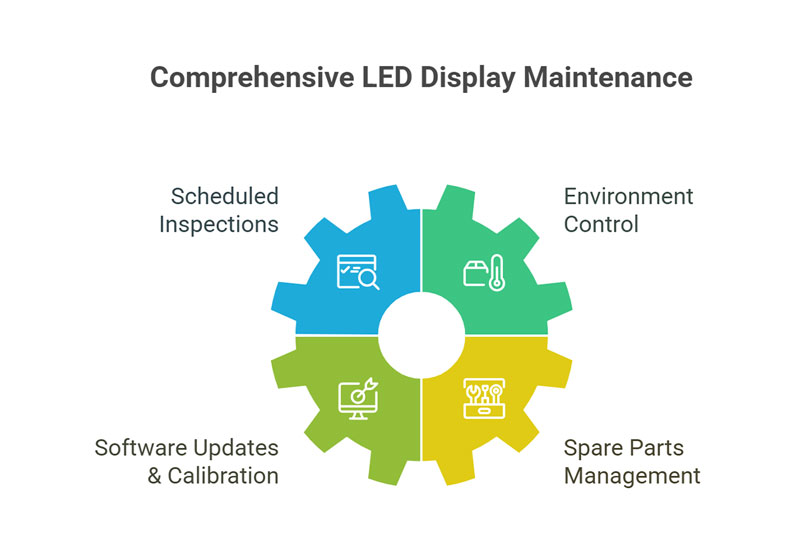
Tip 1. Scheduled Inspections
Monthly visual checks for dead pixels, discoloration, and loose cables.
Clean accumulated dust from modules and PSUs using low-pressure air.
Tip 2. Environment Control
Maintain temperature between 0–40 °C and humidity below 80% for indoor units.
Use IP65-rated cabinets for outdoor installations to block water and dust.
Tip 3. Software Updates & Calibration
Check for firmware updates quarterly.
Re-calibrate color uniformity and brightness at least twice a year.
Tip 4. Spare Parts Management
Stock common modules, PSUs, cables, and fuses on‑site.
Label & rotate spares to avoid obsolete inventory.
7. Frequently Asked Questions
Often, a PSU failure or a missing data signal occurs. Check power rails first, then verify data cable continuity and control card operation.
Look for blown fuses, unlit PSU LEDs, or incorrect DC voltages measured at output terminals.
Yes, water ingress corrodes circuits. Use proper IP-rated enclosures and desiccants for outdoor setups.
Use low-pressure air to remove dust; for smudges, lightly wipe with a lint-free cloth dampened with isopropyl alcohol.
For consistent color and brightness, perform a full calibration every six months or after significant firmware updates.
8. To Sum up
When an LED display not working, every failure is a test of your emergency response capabilities. Dealing with LED display failures can be daunting, but a systematic approach, understanding the core components, diagnosing common failures, and following a structured troubleshooting process can quickly restore your screen. Remember to implement preventive maintenance to keep your LED screen always bright and shining.
Related Posts

LED Screen Repair: Troubleshooting & Fixes & Maintenance
February 2, 2026
This guide delves into LED screen repair, covering its principles, common problems, diagnostic techniques, repair methods, and considerations.
Read More »
Troubleshooting LED COB Display Issues & How to Repair
June 11, 2025
Learn how to solve common COB LED display issues like dead pixels, uneven brightness, and screen distortion.
Read More »
The Comprehensive Guide to LED Screen Components
February 26, 2025
The LED screen components play a key role in creating stunning visuals. Read this post to learn more information!
Read More »