LED Screen Module – Detailed Production Process
LED screen module is the building block of LED displays. It provides vivid visuals and unparalleled performance.
This detailed guide explores the step-by-step production process, covering both indoor LED modules and outdoor LED modules.
Following the footsteps of the UNIT LED module manufacturer, you will seamlessly understand the complex process.
1. LED Screen Module Production Process
1.1 Production Process of Indoor LED Screen Module
1.2 Production Process of Outdoor LED Screen Module
2. LED Display Module Aging Test
4. Why a Robust LED Screen Module Production Process Matters
5. What Types of Modules Do We Manufacture?
1. LED Module Screen Production Process
https://youtu.be/dM0FpJepiZY?si=1hyyXIWkwOTKQKoy
Producing LED display module involves a meticulous process that combines advanced technology and superb craftsmanship.
From preparing PCB boards to assembling indoor and outdoor modules, every step ensures quality and functionality.
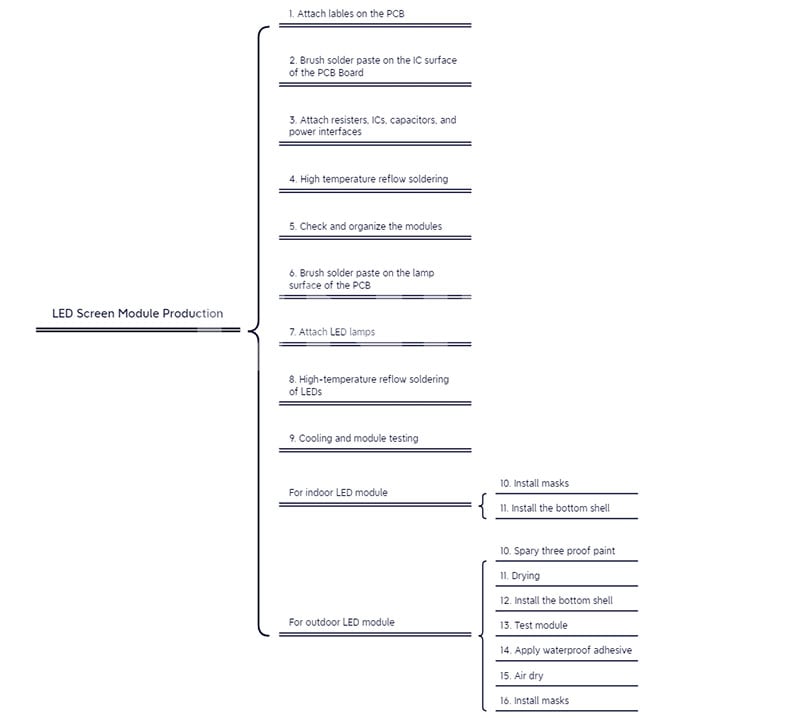
Here is a comprehensive breakdown of the production process:
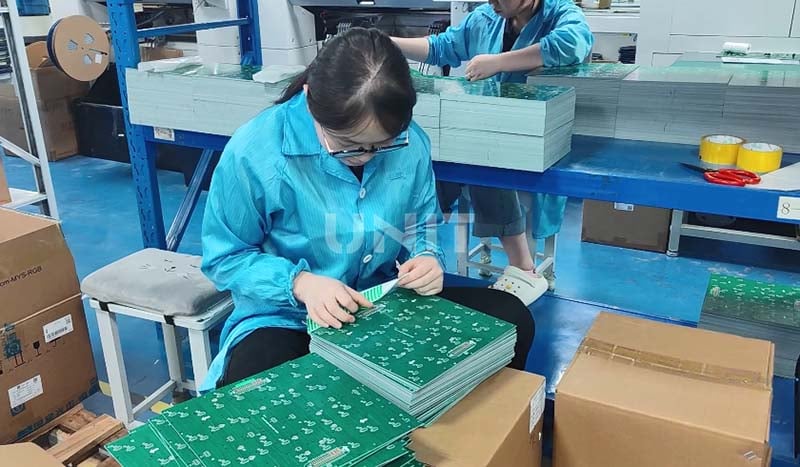
(1) Attaching Labels On the PCB
Production begins with attaching identification labels to the PCB (printed circuit board).
These labels serve as unique identifiers for quality control and tracking throughout the production cycle.
The labels also include key details such as batch number, production date and specifications, making it easier to manage inventory and identify any defects that arise.
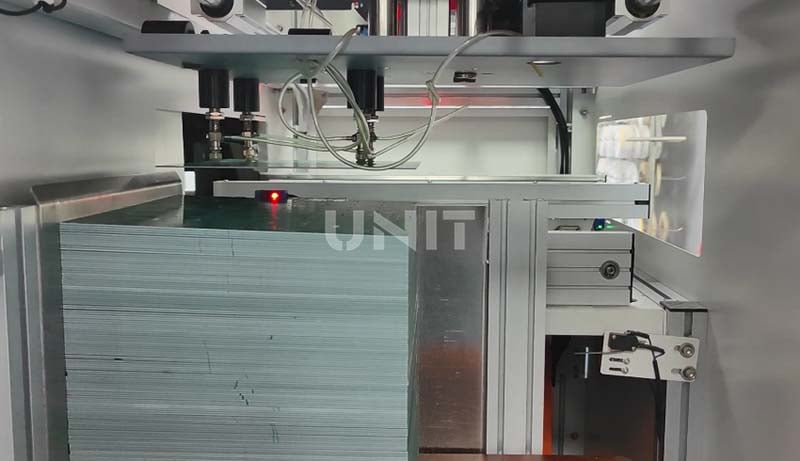
(2) Applying Solder Paste to the IC Surface
Solder paste is a mixture of fine solder particles and flux. It is precisely applied to the IC (integrated circuit) area of the PCB.
This is done using an automatic stencil machine to ensure even coverage and accuracy.
The solder paste acts as a temporary adhesive to hold the components in place and establish electrical connections before soldering.
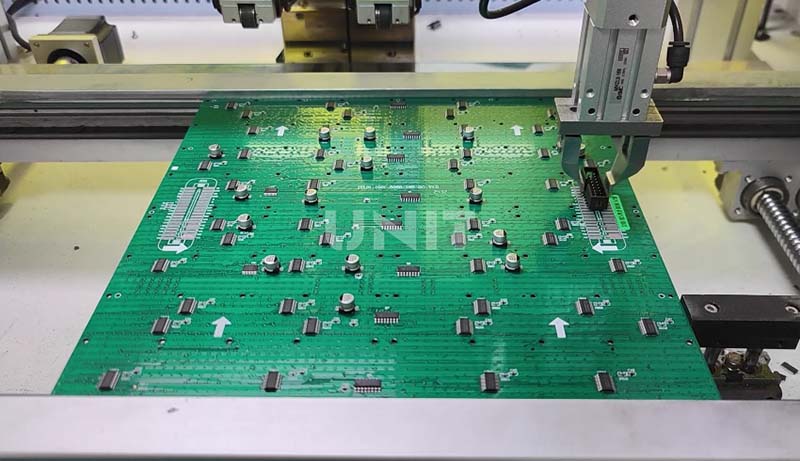
(3) Connecting Resistors, ICs, Capacitors, and Power Interfaces
After applying the solder paste, key electronic components such as resistors, ICs, capacitors, and power interfaces are mounted on the PCB.
This process is usually performed using a surface mount technology (SMT) machine. SMT machines can place components with high precision and speed.
These components are critical to controlling the power, processing, and overall functionality of the LED screen module.
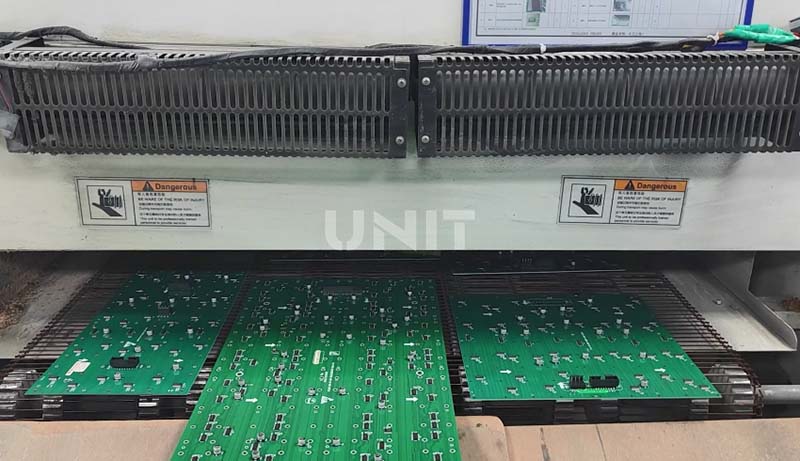
(4) High-temperature Reflow Soldering
The PCB and its mounted components pass through a reflow oven, where they undergo a carefully controlled heating process.
The solder paste melts and solidifies, forming a strong mechanical and electrical connection.
The temperature needs to be closely monitored at this stage to prevent damage to sensitive components. This is also a necessary measure to ensure the long-term reliability of the LED screen module.
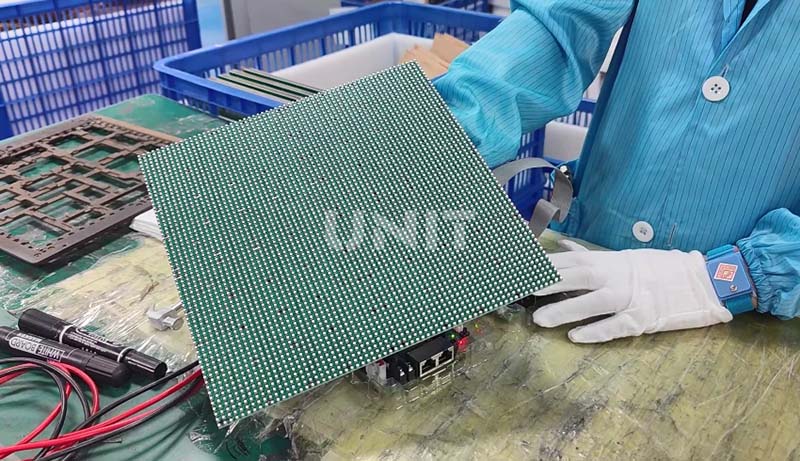
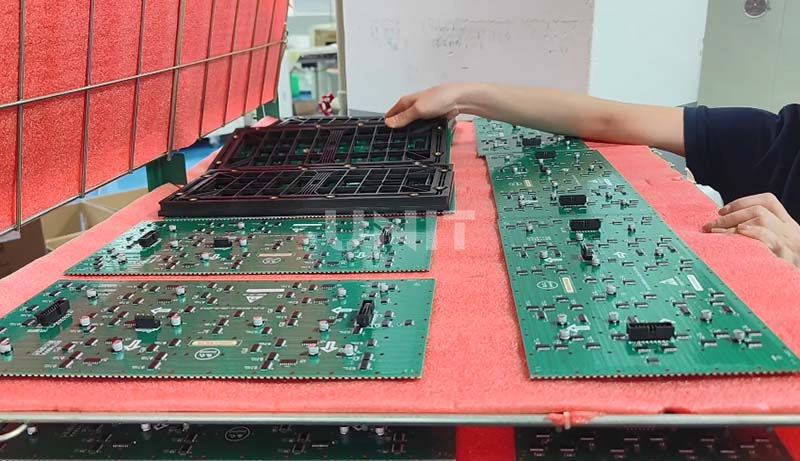
(5) Inspecting and Organizing the LED Screen Module
After reflow soldering, the module is visually inspected and tested.
Automated optical inspection (AOI) systems are often used to check for defects such as component misalignment, soldering issues, or part damage.
Faulty modules are set aside for rework, while approved modules are organized for the next step.
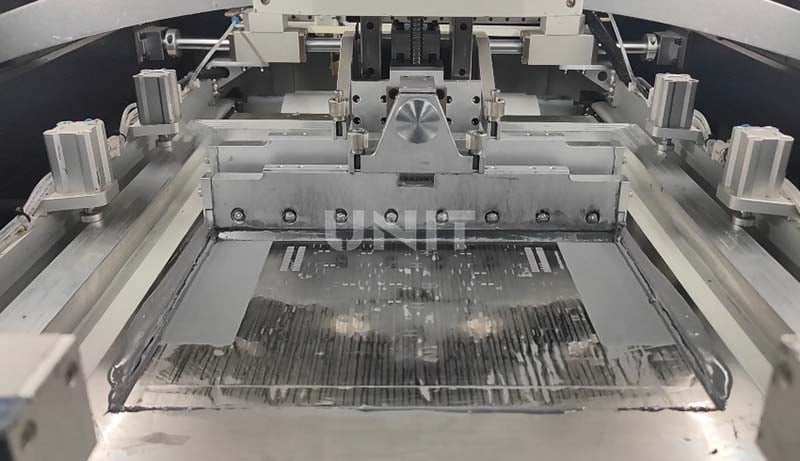
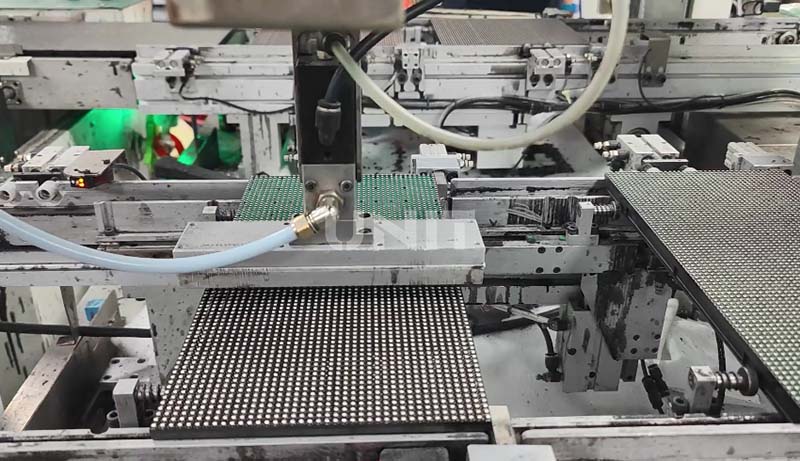
(6) Apply Solder Paste to Lamp Surface
The process now focuses on the lamp surface of the PCB.
A new layer of solder paste is applied using a stencil printer. This layer will secure the LED lamp in place before soldering.
Precision in this step is critical. Uneven application can lead to poor connections and inconsistent brightness in the LED display module.
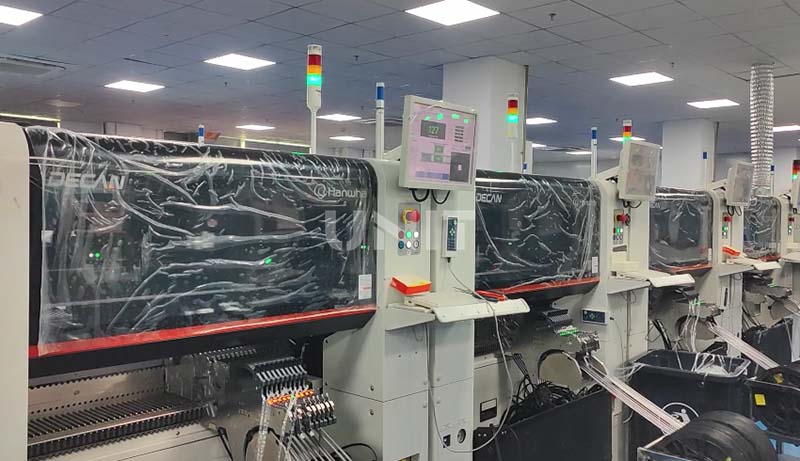
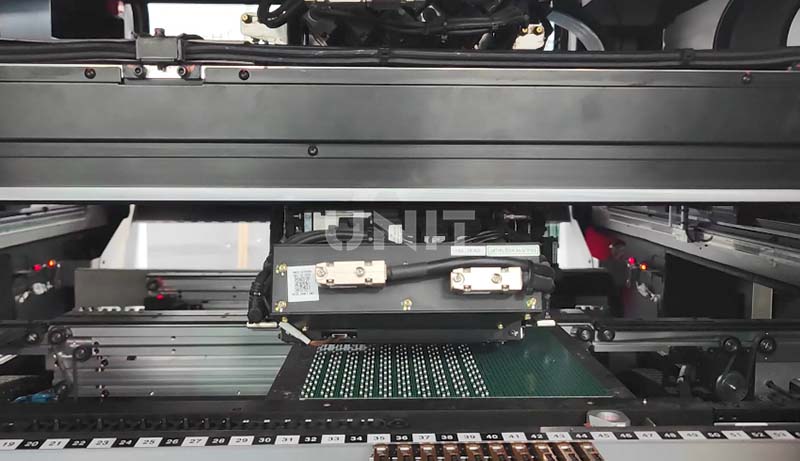
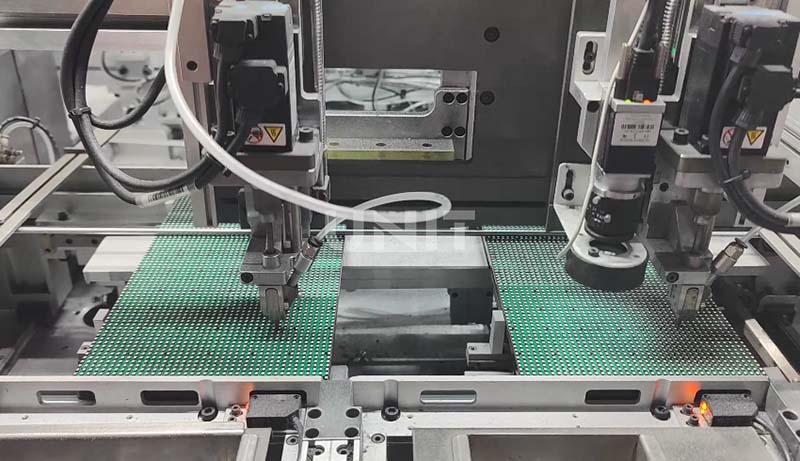
(7) Mounting LED Lamps
LED lamps are the core component of the LED display screen module.
Advanced chip mounters can mount LED lamps on PCBs with extreme precision. LEDs are precisely positioned to ensure consistent pixel alignment.
The quality of the LED lamp beads determines the brightness, color accuracy, and viewing angle of the finished LED panel module.
(8) High-temperature Reflow Soldering of LEDs
The PCB with the LEDs mounted undergoes a second round of reflow soldering.
This process solidifies the LED lamp beads in place, ensuring they are securely attached and electrically connected.
A stable soldering process is crucial here as it affects the performance and durability of the LED screen modules.
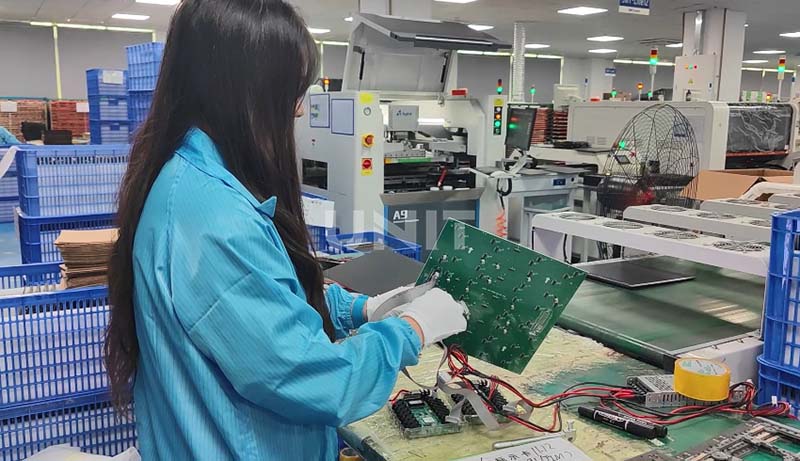
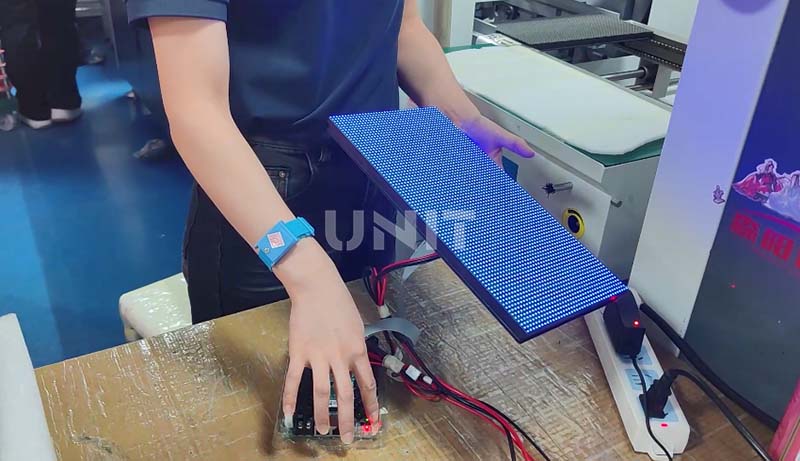
(9) Cooling and LED Screen Module Testing
After soldering, the module is cooled to stabilize its structure.
It is then rigorously tested to ensure that it meets the performance standards of a high-quality LED panel display module. This includes power-on testing, brightness checks, and color calibration.
Faulty modules will be marked as requiring rework or rejected to maintain product quality.
The next steps follow different production processes depending on the type of module. This is determined by the characteristics of indoor and outdoor modules.
First, we will focus on the indoor LED module production workshop to understand what steps are required for indoor modules after testing.
s it affects the performance and durability of the LED screen modules.
1.1 Production Process of Indoor LED Screen Module
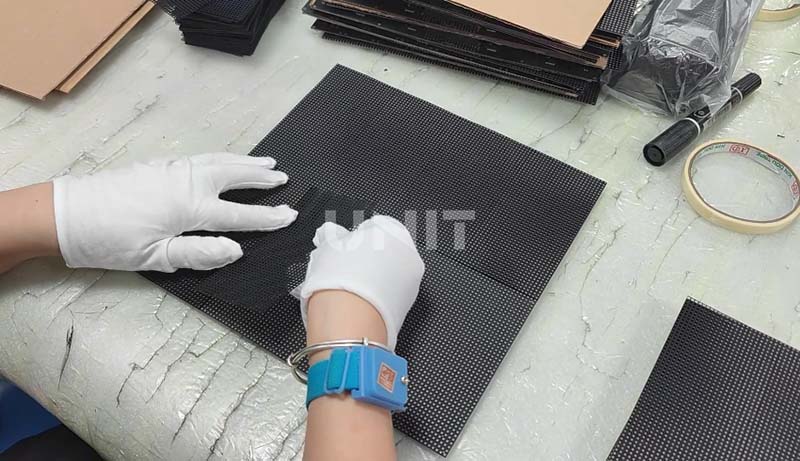
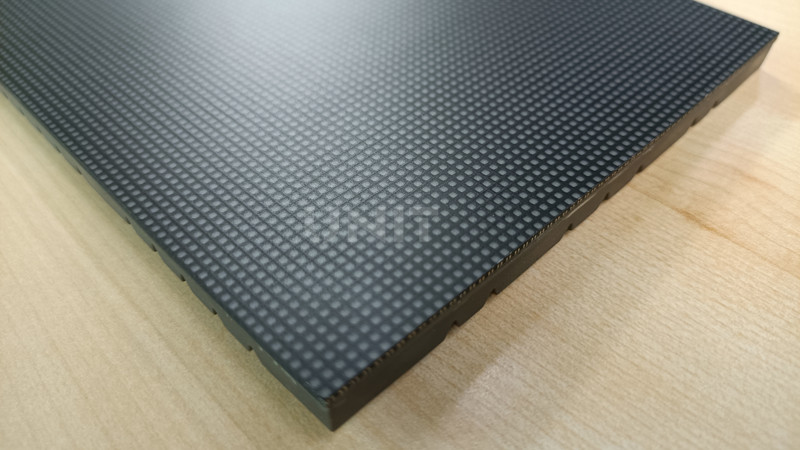
(10) Installing the Mask
For indoor modules, masks are installed on the surface of the LED.
These masks are made of precision molded materials and are designed to enhance contrast, reduce glare, and protect the LED from accidental damage during use.
The masks also define pixel boundaries, contributing to clearer visual output.
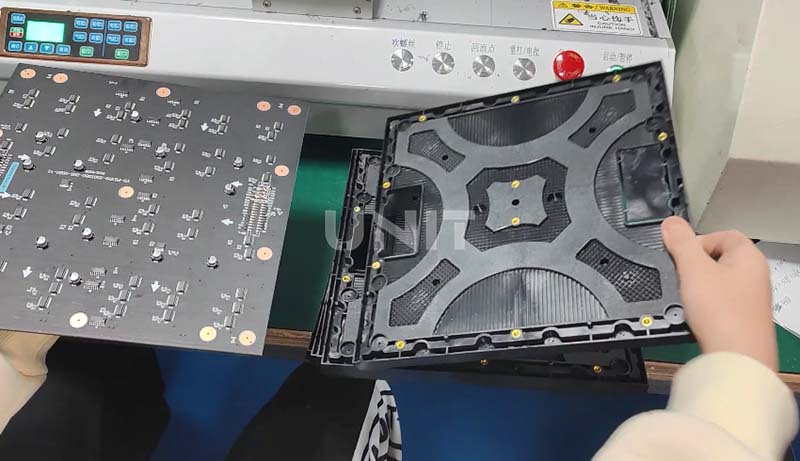
(11) Installing the Bottom Shell
Install a durable bottom shell to provide structural support and simplify installation.
The housing design usually includes ventilation slots to effectively dissipate heat and ensure stable operation during long-term use.
After completing the above steps, the production of indoor LED display modules is completed.
After that, these modules need to undergo aging tests in the aging workshop, cabinet assembly, and other processes.
1.2 Production Process of Outdoor LED Screen Module
The production process of outdoor LED modules is more complicated than that of indoor modules.
Here are the specific production steps:
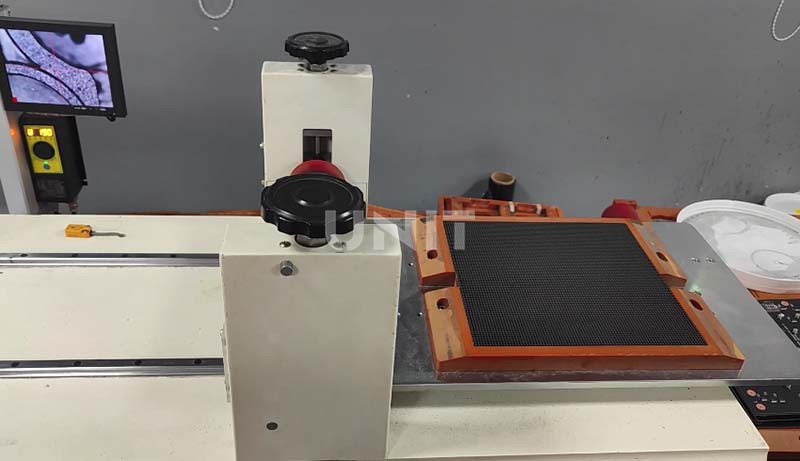
(10) Spraying Three-proof Paint
To prepare the module for outdoor use, a protective three-conformal paint is sprayed on its surface.
This coating protects against:
Moisture resistance: prevents water penetration even in humid or rainy environments.
Corrosion resistance: protects electronic components from chemical reactions caused by exposure to air or pollutants.
Dust resistance: forms a barrier to block particulate matter, ensuring long-term performance.
.jpg)
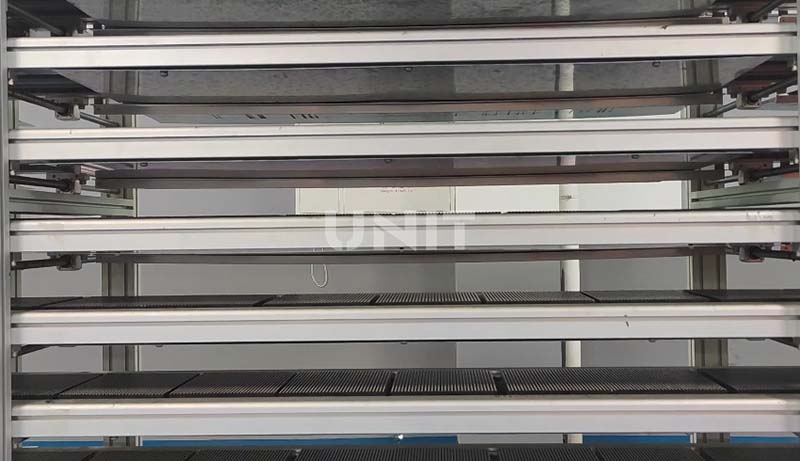
(11) Drying
The module is placed in a controlled drying chamber and the paint hardens into a durable protective layer.
This ensures uniform coverage and enhances the resistance of the modular LED module panel to environmental factors.
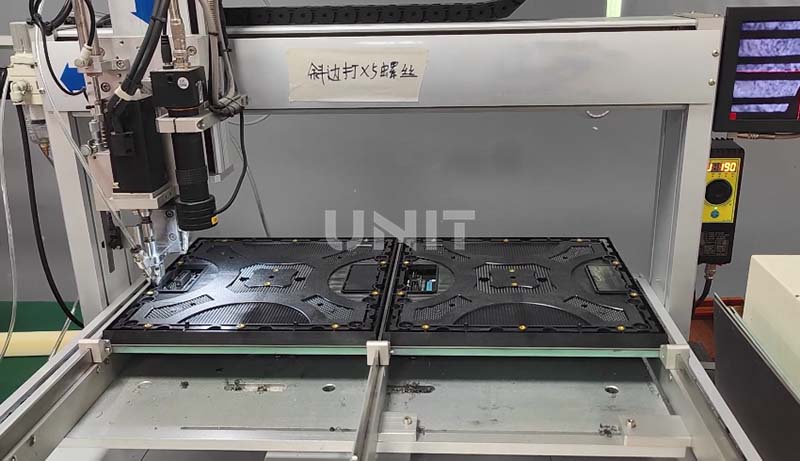
(12) Installing the Bottom Shell
The bottom shell is then installed, similar to indoor LED modules, but designed with greater structural rigidity to withstand outdoor conditions.
(13) LED Screen Module Testing
The assembled outdoor LED display modules are subject to comprehensive testing. This includes waterproofing, brightness calibration, and temperature tolerance.
These tests ensure that the module panels operate reliably in a variety of outdoor environments.
(14) Apply Waterproof Glue
Apply a layer of waterproof glue along the edge of the module to seal gaps and enhance water and dust resistance.
This is especially important for applications in harsh weather conditions.
(15) Air Dry
Allow the glue to air dry under controlled conditions to form a strong, flexible seal.
(16) Install the Masks
Finally, install masks to protect the LEDs, improve visual performance, and increase durability.
The masks for outdoor modules are usually designed to minimize glare from sunlight and improve visibility in bright environments.
The above is the whole process of LED module production. The module is only a part of the LED display.
If you want to know more about the LED screen manufacturing process, the following article can help you.
2. LED Display Module Aging Test
After the module is produced, the next step is to perform module aging.
(1) Purpose and Importance of LED Screen Module Aging
Ensure that each module can still work normally under extreme conditions such as high temperature and high humidity.
Aging tests can expose possible faults or unstable factors in advance.
Effectively avoid problems after the product is put on the market and avoid unnecessary after-sales.
(2) LED Screen Module Aging Process
https://youtu.be/LWt-0Pz2WoM?si=5F1ErEop2zgt7Hmu
The module is tested in a temperature-controlled environment. The temperature is usually set between 45°C-55°C.
The aging process generally lasts 24 to 72 hours. During this period, the module will be constantly turned on and off. This simulates the effect of long-term use.
During this process, workshop personnel will perform functional checks on each module such as brightness, color, and display effect. Modules found to have faults will be centrally repaired.
(3) Advantages
Long-term aging tests help expose early faults and repair them in time.
The aging process helps improve the stability and reliability of the module and increases the long-term service life of the product.
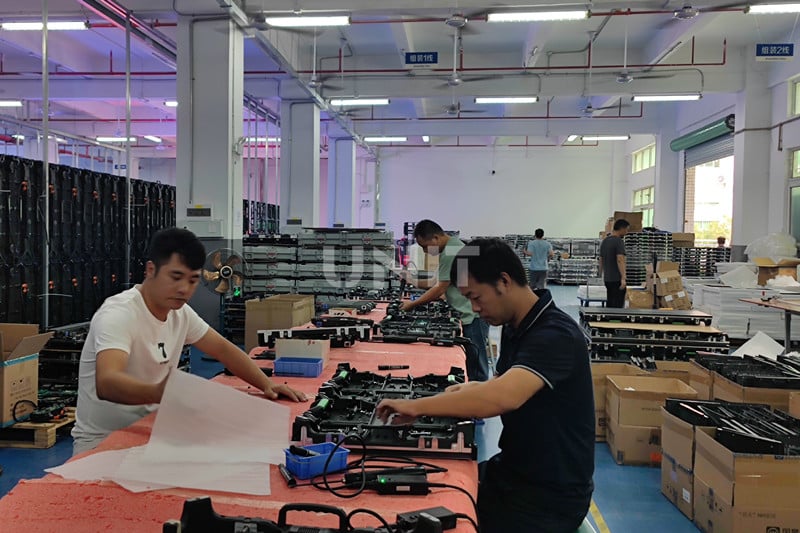
3. Module Assembly Process
After the module passes the aging test, the next step is module assembly. This process integrates individual modules into a complete display system.
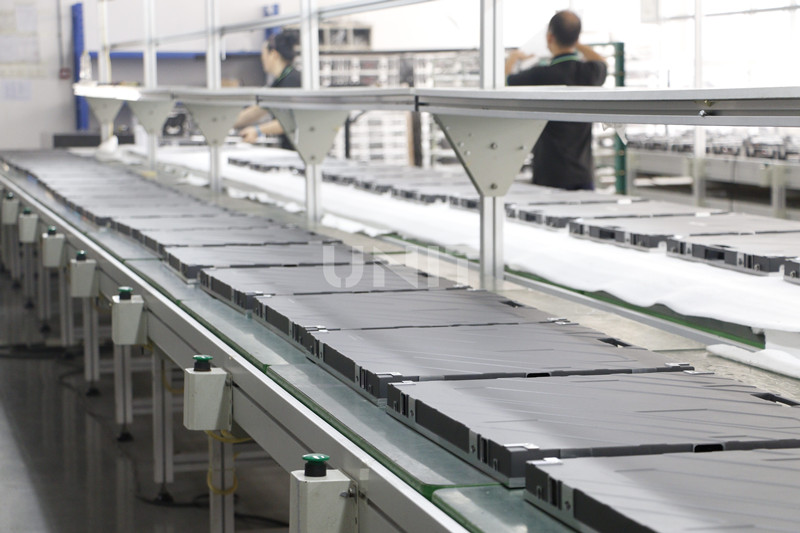
(1) Assembly Line Overview
Join multiple modules together. Ensure that they can work together in the same system to form a consistent display effect.
Install appropriate housings and brackets to ensure that the modules remain stable during use.
(2) Assembly Steps
A. Module Splicing
Connect individual modules through connectors to ensure that the screen is seamlessly connected and avoid gaps.
B. Install Housings and Brackets
Install protective housings for modules to ensure that they are physically protected from damage by the external environment. The installation of brackets allows the display to be firmly fixed.
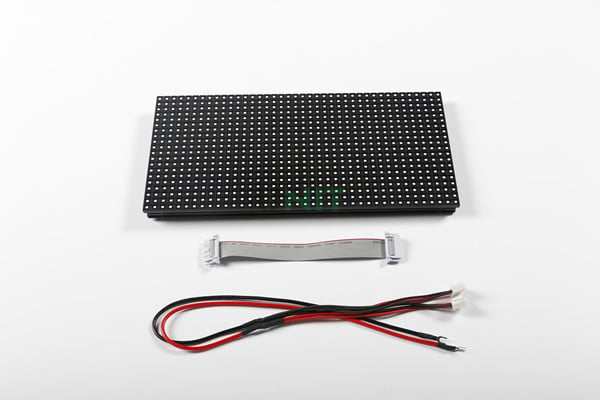
C. Electrical Connection
Connect power and signal cables. Ensure that all modules can be powered and receive data normally.
D. Debugging and Testing
Perform comprehensive functional tests to ensure that the entire assembled system works properly. Including brightness, color, and display consistency tests.
(3) Quality Inspection After Assembly
A. Functional Test
Check whether each spliced module can display synchronously to ensure that there is no color difference or dark area.
B. Safety Check
Check whether the electrical connection is safe to ensure that there is no risk of short circuit or electrical failure.
C. Appearance Check
Ensure that the assembled module has no obvious defects or damage and looks neat.
Through the precise assembly process, multiple modules can be effectively combined and quickly assembled into a large-size display.
Through the two important steps of module aging and assembly, LED screen modules are integrated into modular LED display cabinets.
4. Why a Robust LED Screen Module Production Process Matters
A precise and reliable production process is the backbone of any LED screen module.
Here’s why it plays a vital role in delivering high-quality products:
(1) Ensure Consistent Visual Performance
A well-designed production process ensures uniform brightness, accurate color reproduction, and seamless visuals.
This consistency is critical for applications such as advertising displays, event screens, and control rooms. This is because image quality directly affects the viewing experience.
(2) Enhanced Durability
Robust manufacturing methods such as reflow soldering and protective coatings ensure that the module can withstand environmental challenges.
For outdoor modules, processes such as conformal coating application and waterproof sealing provide resistance to moisture, dust, and temperature fluctuations.
(3) Minimize Defects
From solder paste application to final testing, every stage of production is designed to reduce errors.
Rigorous inspection and automated systems help eliminate problems such as component misalignment, soldering defects, or LED failures.
(4) Support Scalability and Customization
Well-structured processes enable LED module manufacturers to efficiently scale up production while maintaining quality.
Most manufacturers support customized services. They have the ability to produce modules with unique shapes or sizes to meet specific customer needs.
(5) Save Customers’ Time
A comprehensive and rigorous production process of LED display screen module requires more time and energy for manufacturers.
But it can minimize rework, returns and warranty. High-quality modules can allow customers to get the best service.
5. What Types of Modules Do We Manufacture?
We specialize in manufacturing a wide range of LED modules to meet a variety of display requirements. Whether for indoor or outdoor use, fixed or flexible configuration.
The following are the main types of LED modules we produce:
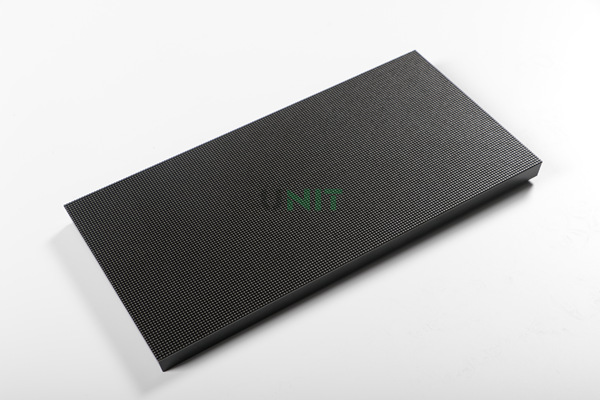
(1) Indoor LED Display Module
– High resolution and color accuracy for vivid and clear images.
– Ideal for controlled lighting environments such as shopping malls, airports, and conference halls.
– Typically adopts a variety of pixel pitches such as P1.56mm, P1.875mm, P2mm, P2.5mm and P3mm for excellent clarity.
LED indoor modules are designed for high-quality visual performance in controlled environments.
They are ideal for applications such as retail displays, control rooms, and indoor advertising screens.
(2) Outdoor LED Screen Module
– Weatherproof and durable: can handle rain, win,d and UV exposure.
– High brightness: ensures visibility in bright outdoor environments.
– Available in various pixel pitches: including P4mm, P5mm, P6mm, P8mm, P10mm and so on.
Waterproof outdoor LED module panels can withstand harsh weather conditions and provide bright and clear images in direct sunlight.
They are ideal for large outdoor displays such as billboards, stadium screens, and transportation hubs.
(3) GOB LED Screen Module
– Improved display consistency and lifespan.
– Enhanced protection against moisture, dust, and physical damage.
– Commonly used in outdoor displays and high-traffic locations where durability is key.
GOB modules’ unique coating process improves durability and performance.
GOB technology encapsulates LED chips with a protective resin, making them more resistant to damage and environmental factors.
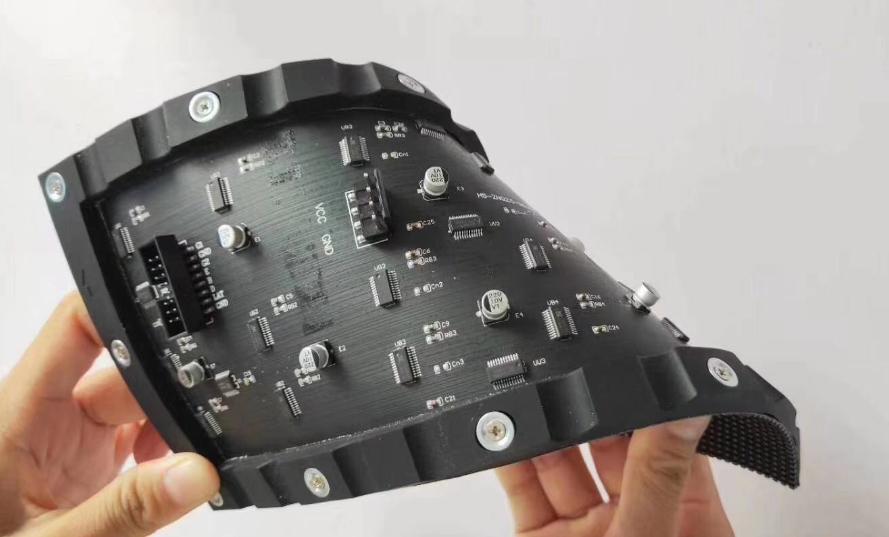
(4) Soft Flexible LED Module
– Highly flexible: ideal for applications requiring curved or non-standard screen shapes.
– Lightweight and easy to install: ideal for creative installations in shopping malls, museums, and exhibitions.
– Suitable for both indoor and outdoor use: outdoor flexible LED modules have a good waterproof rating.
Flexible LED screen module is highly flexible. It can be bent or shaped to fit custom designs, ideal for curved or irregular display surfaces.
As a professional LED module manufacturer in China, UNIT LED focuses on providing the right LED module for every application. Our professional team can provide the best solution for your needs.
Learn more about LED screen suppliers in China: http://wp.luotec.com/led-screen-supplier
6. Conclusion
From production to aging test and assembly, every step is to obtain LED screen modules with high quality and stability.
Whether it is indoor application or outdoor advertising, LED screen modules that have undergone strict production and quality inspection can guarantee long-lasting performance.
Choose high-quality LED screen modules to make your display project more perfect!
As a leading LED module manufacturer, UNIT LED is committed to providing customers with the best quality products and solutions. Welcome to contact us and start an excellent display journey!